


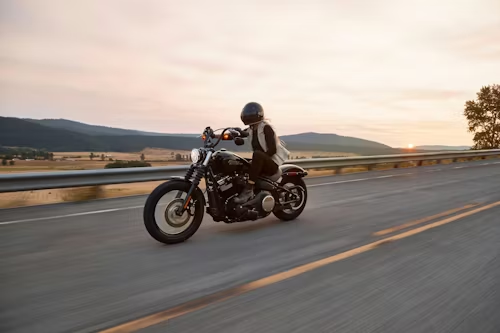
There’s something oddly satisfying about the idea of building a motorcycle with your own hands. Not just owning one, but shaping it—choosing how it looks, how it sounds, even how it feels when it rolls down the road. For a lot of beginners, though, it also feels intimidating. You might imagine a workshop full of expensive tools, complicated diagrams, and mechanics who seem to speak another language.
The truth is more down-to-earth. Building a custom motorcycle is closer to assembling high-end furniture or restoring an old car than it is to engineering something from zero. You don’t need to invent every part—you’re selecting, fitting, adjusting, and learning as you go. Think of it like cooking a meal from scratch: you don’t grow the vegetables or mill the flour, but you do combine everything into something uniquely yours.
Let’s break it down into a simple, realistic path.
Choosing the Right Donor Bike and Planning Your Build
Every custom motorcycle starts with what builders call a “donor bike.” This is simply the base motorcycle you’re going to modify. It’s like buying a secondhand house you plan to renovate instead of building one from bare land.
For beginners, this step is where most mistakes happen—not because it’s difficult, but because excitement takes over logic. People often buy a bike because it “looks cool” instead of because it’s easy to work on or has available parts.
A good beginner-friendly donor bike usually has:
- A simple engine (single or twin cylinder is ideal)
- Wide availability of spare parts
- A strong community of builders online
For example, older Honda models or Yamaha commuters are popular starting points because they’re like the “Toyota Corolla” of motorcycles—reliable, widely understood, and forgiving when you make mistakes.
At this stage, planning matters more than tools. Ask yourself:
- What style do I want? (café racer, scrambler, bobber)
- Am I building for looks, performance, or daily riding?
- What’s my realistic budget?
This is similar to planning a home renovation. You wouldn’t start knocking down walls without knowing whether you want a modern kitchen or a cozy rustic vibe. The same logic applies here.
A helpful tip: write your build plan down like a shopping list. Engine work, tires, seat, lighting, paint. Each category becomes a small project instead of one overwhelming mountain.
Stripping Down and Rebuilding: The Garage Phase
Once you have your donor bike, the real hands-on journey begins. This is the part where the bike is stripped down, cleaned, and slowly rebuilt into something new.
Stripping a bike sounds dramatic, but it’s really just careful disassembly. Think of it like unpacking a complicated piece of IKEA furniture—but instead of instructions telling you what goes where, you’re creating the instructions as you go.
You remove parts like:
- Seat and tank
- Exhaust system
- Lights and wiring
- Body panels and sometimes even the frame components
As you strip the bike, organization becomes your best friend. One of the most common beginner mistakes is tossing bolts into a random box and hoping future-you remembers where everything goes. A better approach is using labeled containers or even simple zip-lock bags with notes. It sounds basic, but professional workshops work the same way.
Once the bike is stripped, cleaning becomes almost therapeutic. Years of grease, dust, and grime come off, revealing the actual structure underneath. Many builders describe this moment like uncovering an old object from storage—you finally see what you’re really working with.
Rebuilding is where creativity kicks in. You start deciding:
- Do I want a slimmer seat or a vintage-style one?
- Should the handlebars be low and aggressive or high and relaxed?
- What parts are worth upgrading versus keeping original?
This phase is a lot like renovating a kitchen. You don’t just put everything back—you decide what stays, what gets replaced, and what gets improved. A scratched countertop might be replaced, while solid cabinets get refinished instead of thrown away.
The key mindset here is patience. A custom bike isn’t built in a weekend. It evolves in stages, and each stage teaches you something new.
Wiring, Finishing Touches, and Making It Road Ready
This is where many beginners either panic or gain a new level of respect for electrical systems. Motorcycle wiring sounds complex, but at its core, it’s just organized electricity flow—like the wiring behind a home light switch or a computer setup.
A wiring system controls:
- Headlights and indicators
- Ignition and starting system
- Battery charging
- Dashboard or gauges
If you’ve ever plugged multiple devices into a power strip and tried to keep things neat, you already understand the basic challenge: everything needs power, but it also needs order.
This is also the stage where small upgrades make a big difference. A better headlight can transform visibility at night. A cleaner wiring setup can make the whole bike feel professionally built instead of “garage assembled.”
This is where builders often rely on specialized components and kits to simplify things. Some workshops and builders, including those featured on purpose built moto, emphasize plug-and-play electrical systems and modular parts that reduce wiring confusion and make builds more reliable for first-timers.
Once the electrical system is stable, the finishing touches begin:
- Paint or powder coating the frame
- Upholstering the seat
- Aligning wheels and suspension
- Testing brakes and throttle response
This stage is similar to the final hour of assembling a custom PC or finishing a home renovation. Everything starts coming together visually and functionally. Small adjustments matter a lot—tightening a bolt, fixing a cable angle, or adjusting idle speed can completely change how the bike feels.
Finally comes the road readiness check. This is not just a formality—it’s safety. You test:
- Braking distance
- Steering stability
- Engine response
- Electrical reliability
It’s the motorcycle equivalent of test-driving a car after repairs or tasting food before serving it to guests. You’re making sure everything not only works, but works well together.
Building a custom motorcycle from scratch isn’t about being a professional mechanic on day one. It’s about curiosity, patience, and a willingness to learn through doing. Each stage—from choosing a donor bike to tightening the final bolt—teaches you something practical about machines, problem-solving, and even creativity.
And in the end, the real reward isn’t just the finished motorcycle. It’s the fact that every part of it carries your decisions, your mistakes, and your improvements. That’s what makes it truly custom.
